Growing Mushrooms on Logs
Grow Gourmet Mushrooms Like a Pro!
A complete log inoculation bundle makes it easy to grow mushrooms in bulk on fresh hardwood logs. These detailed instructions will give you all the info you need to get started on your mushroom-growing journey!
Step 1: Select Your Logs
Start by choosing the appropriate log for your specific mushroom variety. The log species should be compatible with the mushroom strain you want to grow using your mushroom grow kit. Hardwood logs like oak, maple, beech, and birch are commonly used for many edible fungi. Avoid using softwoods like pine, as many species of mushrooms prefer hardwoods. Also avoid highly resinous tree species like cedar.
Specific mushroom species prefer certain types of wood. Oyster mushrooms (Pleurotus ostreatus) especially love deciduous hardwoods like oak, aspen, and poplar. Maple and hickory also can perform well. Lion's mane mushrooms (Hericium erinaceus) grow best on beech and oak logs. Shiitake mushrooms (Lentinula edodes) prefer oak but can also be grown on maple and beech.
Log diameter should ideally be between 3-8 inches, with length around 3-4 feet. This size is manageable and provides sufficient substrate for the mushrooms. Freshly cut logs are best for growing mushrooms on logs, preferably within a few weeks of cutting. Ensure the tree was healthy when cut and shows no signs of preexisting fungal colonization. One 5-pound bag of sawdust spawn is sufficient to inoculate 15 to 30 three-foot-long logs, depending on diameter.
Step 2: Drill Holes
Use a 5/8" drill bit to create a series of holes to accommodate your log inoculation tool. Holes should be about 2 inches deep and spaced roughly 6 inches apart in a diamond pattern along the log. The holes for each row should be staggered from the row before to maximize the inoculation area. Note that hole spacing and depth need not be perfect.
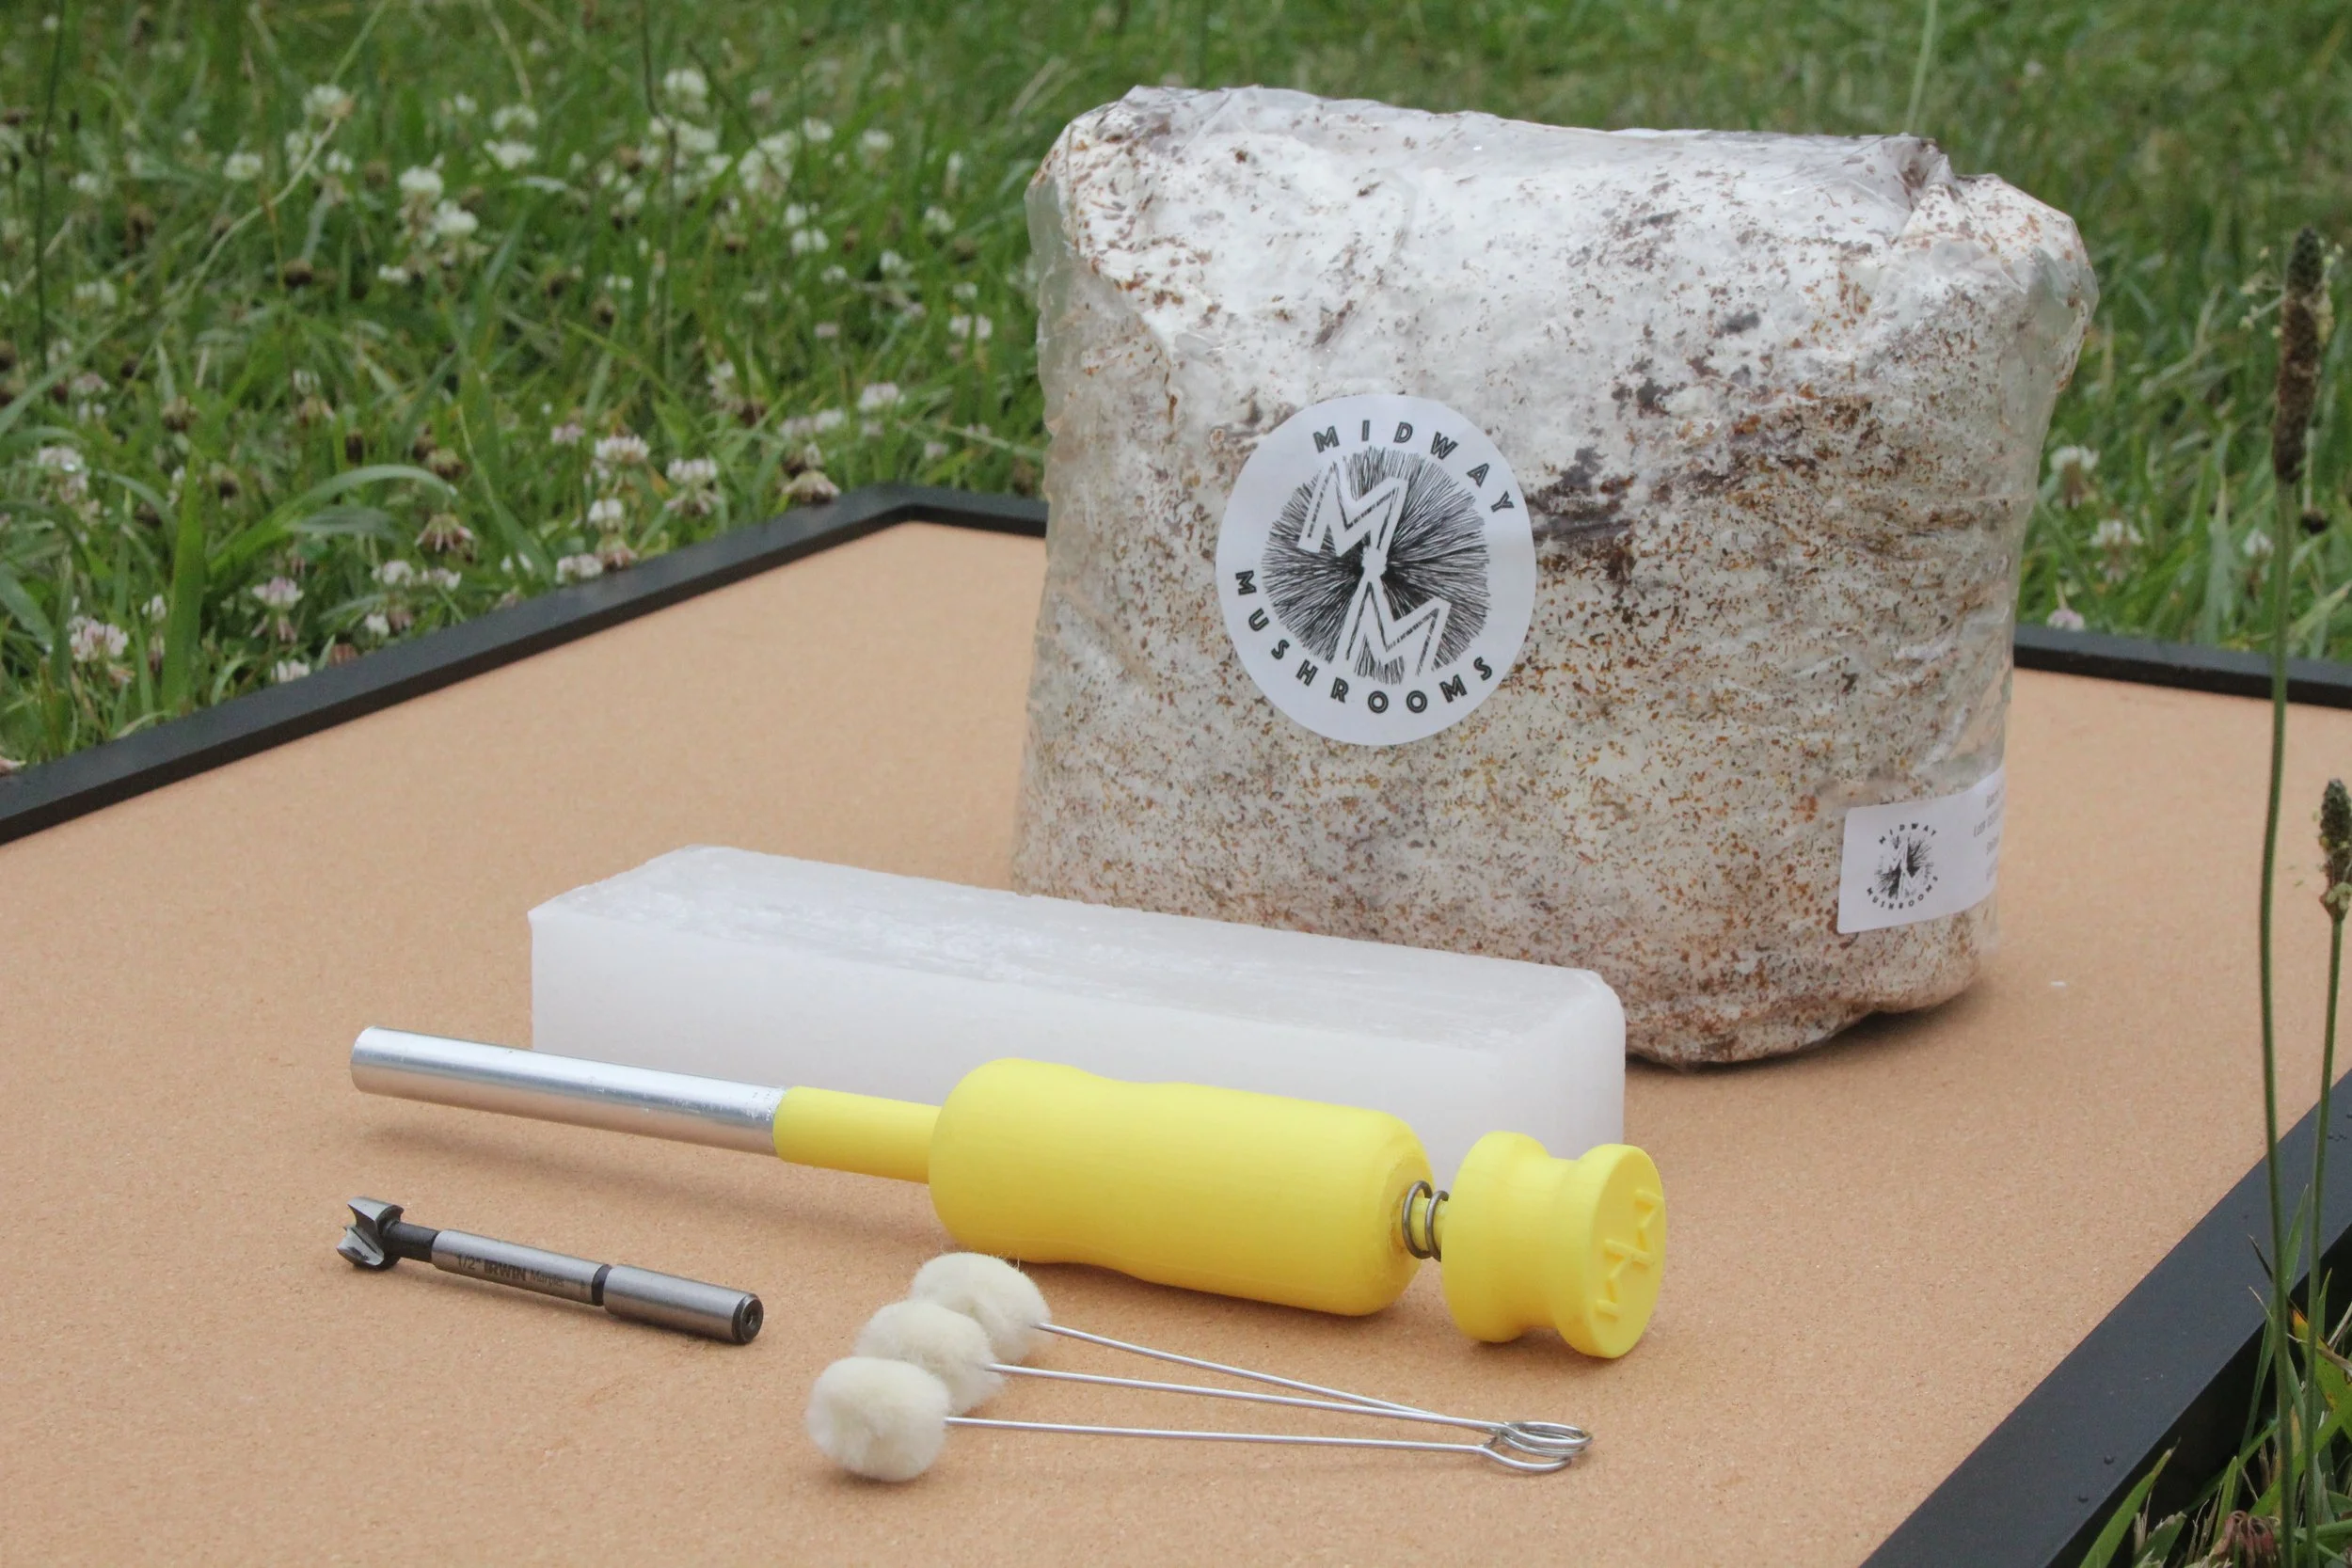
Step 3: Fill INoculator and dispense Spawn
Prep your inoculation space by crumbling up the sawdust spawn inside its plastic bag. Be thorough. This may take a minute or two, especially if the spawn has hardened after sitting idle for some weeks. Then dispense some of the spawn into a clean, hard-bottomed container. Some growers choose to then sterilize the inoculator with rubbing alcohol.
Place your spawn container within easy reach of your drilled log, and now fill your inoculator tool with spawn by quickly pressing the metal tip down 3 or 4 times into the spawn pile until it’s nicely packed. Then insert the tip of the inoculator into a drilled hole. Use your palm to press the plunger and push the spawn out into the hole. Ideally the hole will be entirely filled with sawdust spawn.
Repeat this process for each hole on the log for growing mushrooms on logs effectively using your mushroom grow kit. Then take a moment to give your mushroom log inoculation tool a nice rinse after you’re finished dispensing spawn in order to reduce the risk of contamination during future inoculation sessions.


Step 4: Melt Wax and Seal Holes
After each hole is filled with spawn, it must be sealed to prevent the spawn from drying out and to protect it from competing organisms. Melt food-grade wax (like beeswax or cheese wax/ paraffin) in a double boiler until it reaches a liquid state. A portable camp stove can be nice for this purpose. Now carefully dip your wax dauber or brush into the melted wax, ensuring it's coated but not dripping, and apply it over each hole.

Step 5: Place Logs
Place the inoculated logs from your mushroom grow kit in a shady, well-ventilated outdoor area that maintains high humidity. The logs should not be in direct sunlight or a place where they could dry out. Stacking the logs "log cabin style" or leaning them against each other in a teepee formation can help maintain appropriate moisture levels and temperature.
Step 6: Maintain a Suitable Growth EnVironment
During dry periods, water your logs lightly with non-chlorinated water. When you’re growing mushrooms on logs, ensuring they remain moist, but not fully soaked through, is essential.
During the colder months, especially if you live in an environment prone to sub-freezing temperatures, you may choose to protect your logs by covering them with a layer of straw or by burying them under leaves. Insulating the logs helps the mycelium survive the cold season and continue growing mushrooms on logs when the temperature warms up.
STep 7: Wait for it… Then Harvest !!
The spawn will take 6 months to 1 year to fully colonize the log when using your mushroom grow kit, depending on the mushroom species and environmental conditions. (Depending on log condition, colonization may sometimes take even longer). Once fully colonized, mushrooms typically fruit in response to environmental triggers like temperature drops or moisture spikes.


Step 8: Subsequent Harvests and Log Lifespan
After the first fruiting, logs will typically produce crops of mushrooms every few months, generally in the spring and fall, for several years. A typical yield is 1/2 to 1 pound of fresh mushrooms per year for each log, though it’s not uncommon to achieve harvests well beyond this amount, especially for the first several harvest seasons.
The lifespan of the log when using a mushroom grow kit can range from 3 to 5 years (but sometimes even up to 7 years!). Once the mushrooms stop growing, the log has reached the end of its productive life and can be composted.
Remember, successful mushroom cultivation involves a lot of variables. It may take a few tries to find the best method that works for your specific situation. So don't be discouraged if the first few attempts at growing mushrooms on logs are met with mixed results. Ultimately the fungus shall prevail!
Happy farming!!
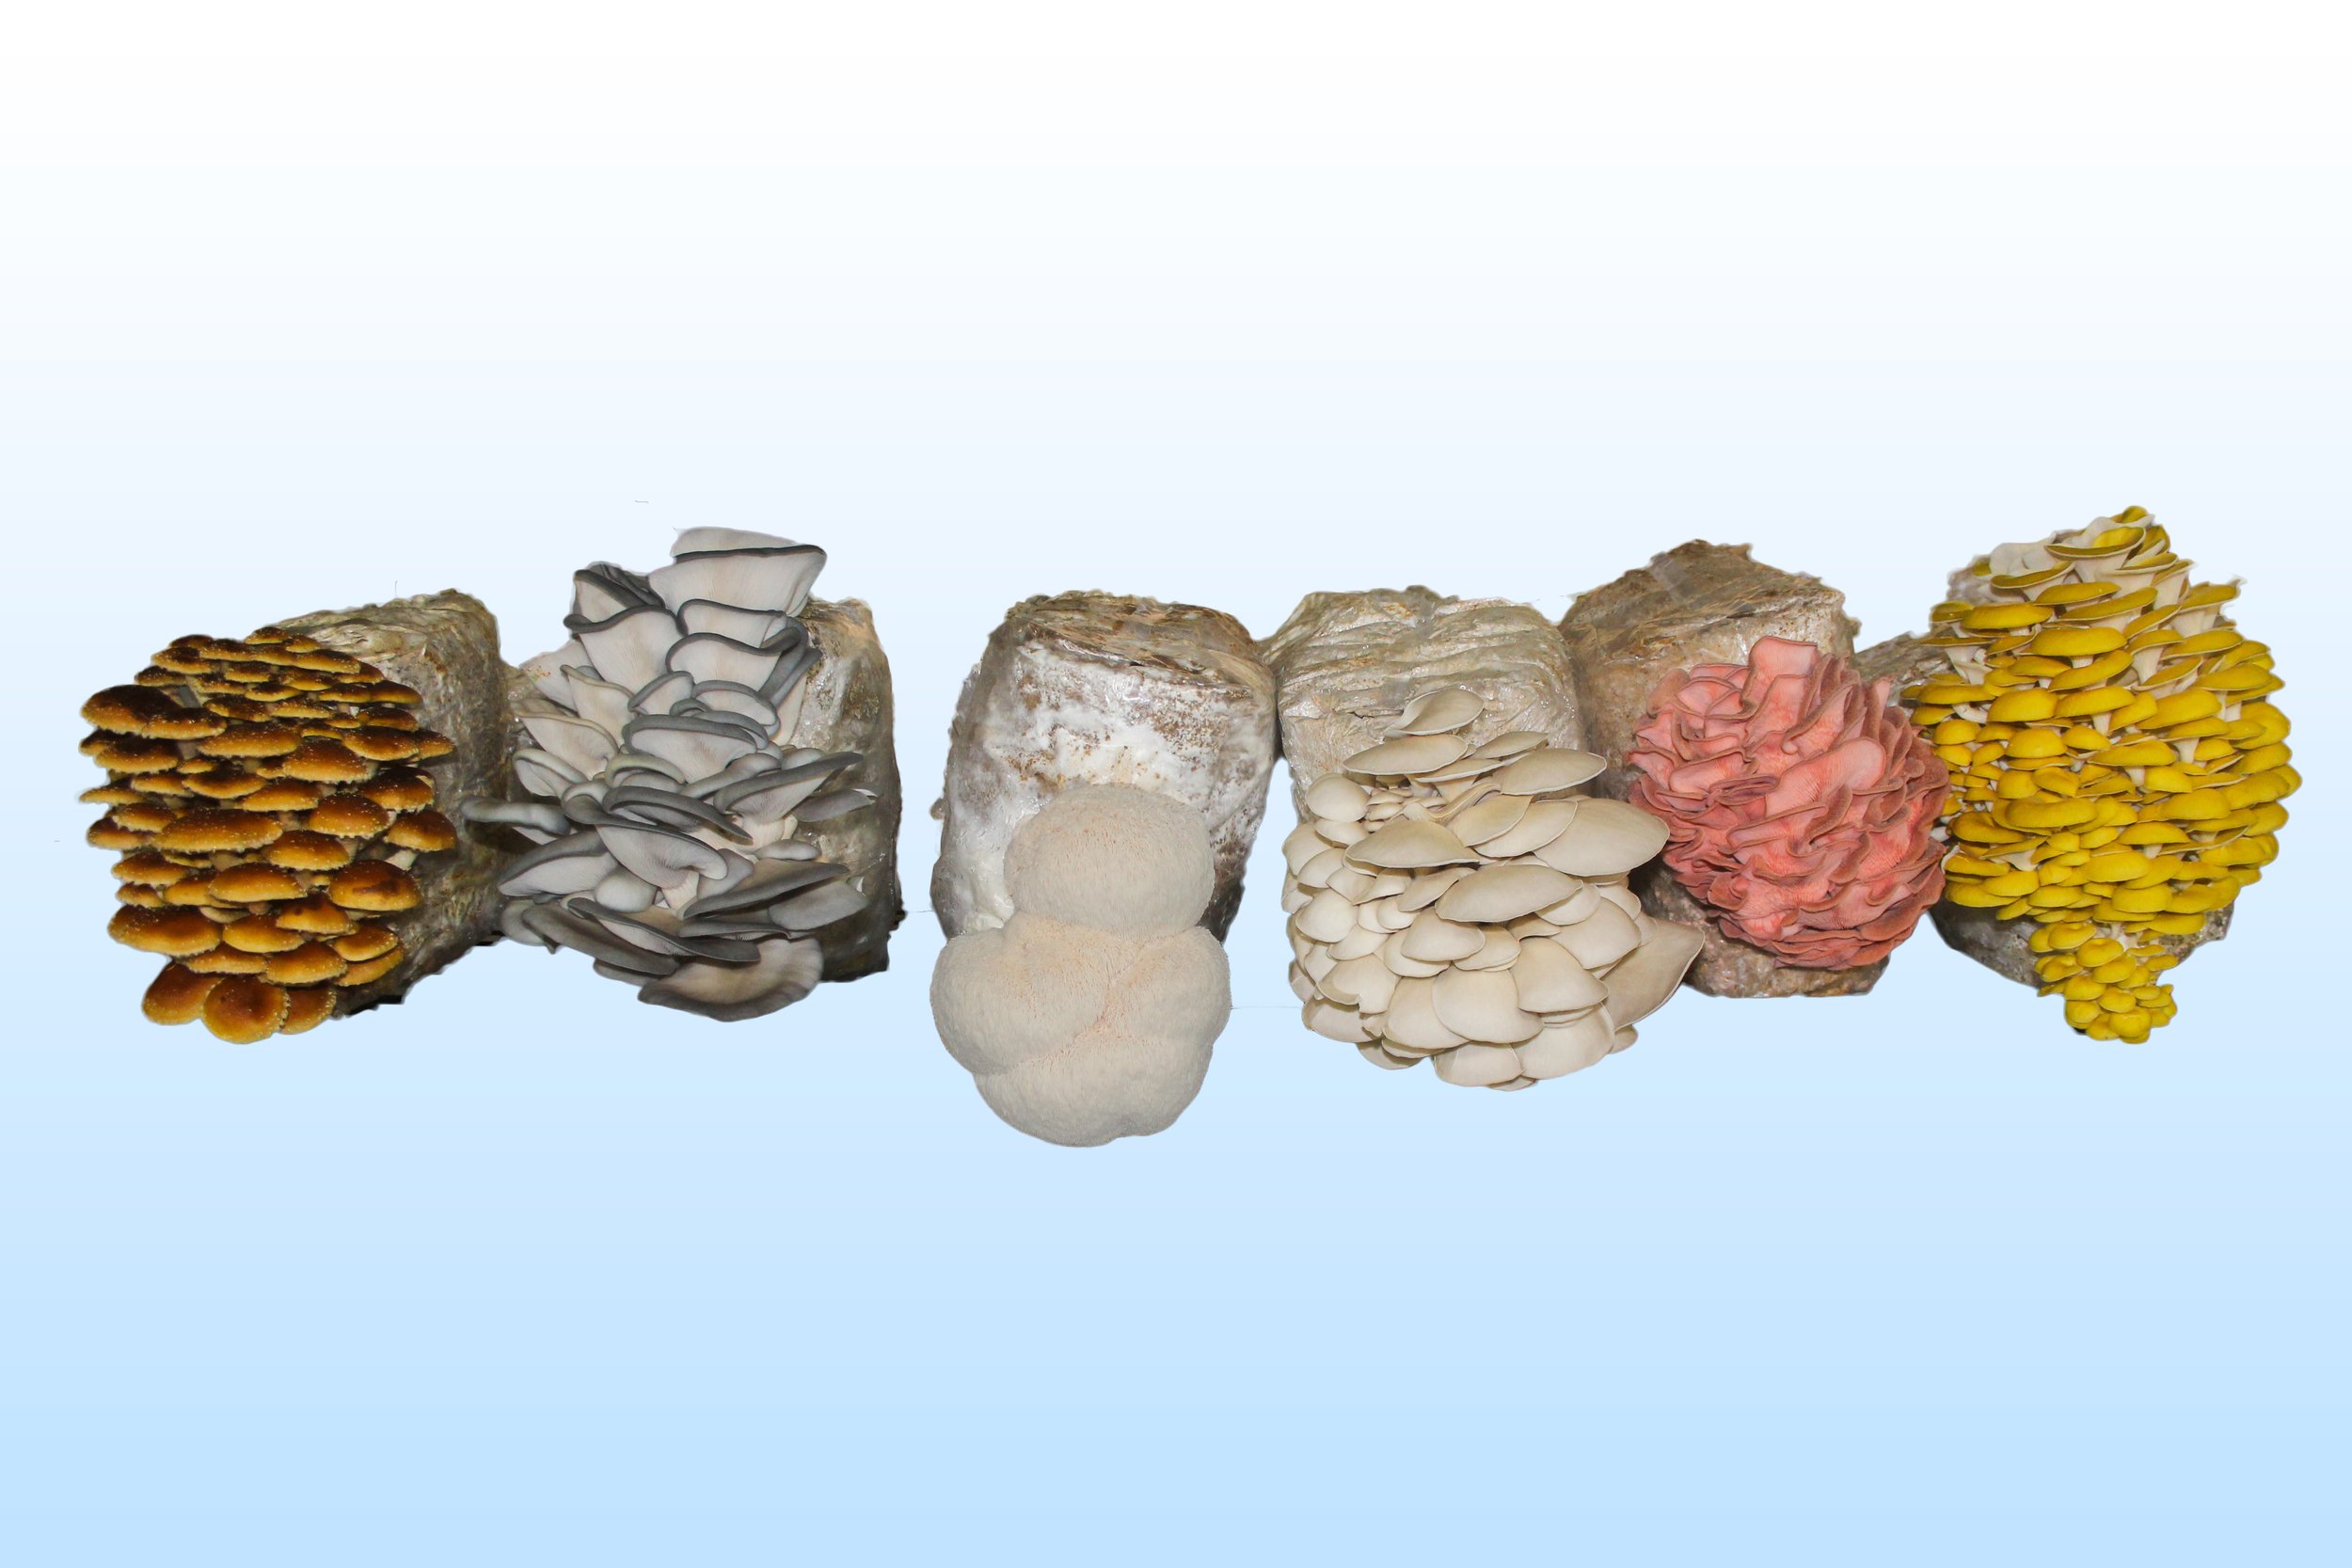
Mushrooms every color of the rainbow
See our full lineup of mushroom log grow kits to try your hand at other delicious species. We currently offer offer bundles for shiitake, lion’s mane, blue oyster, and the classic oyster mushroom.